Create a Fun Underwater Scene in Photoshop
One of the great, fun aspects of Photoshop is being able to create your own photos from elements of other pictures. In this new tutorial, I’m going to be making an underwater scene.
Step 1
The most important part of any photo montage or ‘chop’ is finding good sources. There are many stock photo sites out there and lots are free. But the best way to get good source images is to take out your camera and shoot them yourself. Unfortunately, in this tutorial I have no intention of getting my camera wet, so these will have to do. The first job (and probably the most boring) is to cut out the images you are going to use. There are different ways of doing this depending on the needs of your photo. Here, I’m going to be using the pen tool, as there are lots of angular lines and, more importantly, no hair!
Step 2
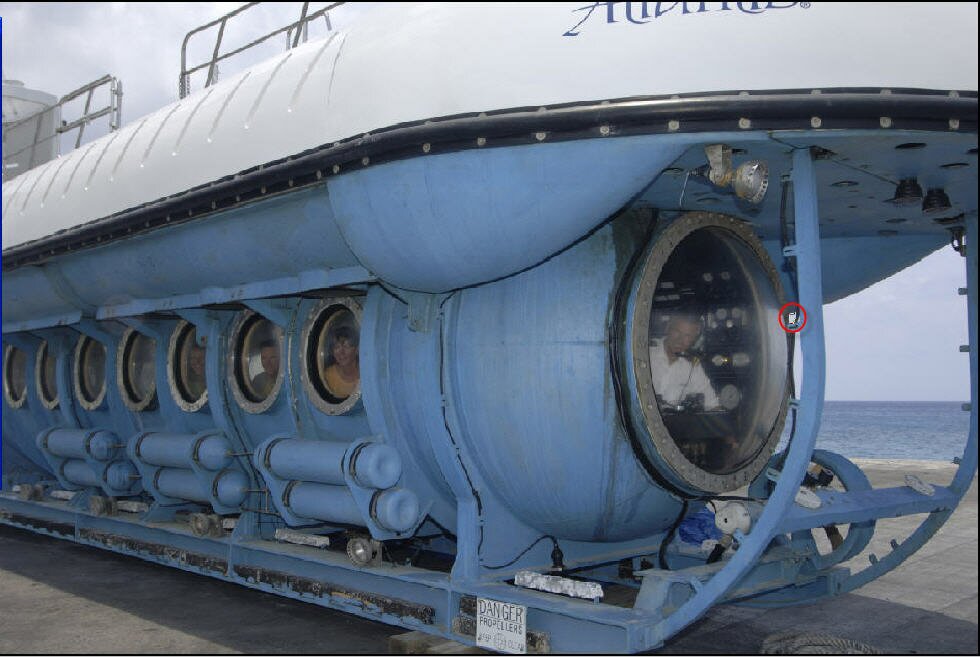
Hit ‘Z’ to activate the zoom tool and zoom in as much as possible on the little piece of sky (circled red in the first image). Press ‘P’ for the pen tool as click 6 times, always keeping just a little bit within the submarine.

Step 3
If you hold the spacebar you will be able to drag the canvas around with the mouse. Do some more work with the pen tool. If you click the PATHS tab you will see all the paths you have made in a thumbnail. This will be important later on when you have finished, but for now it’s a question of putting your head down and making more lines with the pen tool.

Step 4
When you come to a curved piece, click with the pen tool and drag it in the direction you want to go. This takes a little practise, but you’ll soon get used to it. (Use CRTL+Z to undo the last action. Unfortunately, CRTL+Z a second time redoes the undo? Very confusing I know. To undo two actions press CRTL+Z and then CRTL+ALT+Z.

Step 5
Here I have gone and finished all the pen lines needed. It took a long time, but I stopped quite often to rest (and smoke!). The faster you do it the worse the results, remember.

Step 6
Ok, here’s where we need the PATHS panel thumbnail. If you CRTL+ click on it your path will turn into a selection. Very handy. But careful! We haven’t selected the submarine. In fact, we have selected everything but the sub. SHIFT+CRTL+I to invert the selection. Now you can CRTL+C to copy. CRTl+N to open a new document and CRTL+V to paste.

Step 7
Time to look for some water. I like Morguefile.com for stock photos. I have opened the water image in Photoshop and pasted our submarine on top of it. Then I dragged the water image on to the ‘Create new layer’ icon, and dragged this on top of the sub. Of course, the submarine has vanished because it is now hidden by the new layer.

Step 8
This is not a problem, though. Simply change the blend mode to Multiply for a deep water scene, or choose another blending mode for a different look and feel.

Step 9
You may have noticed that the front of the submarine is missing because it wasn’t in the source image. There’s an easy remedy for this: hide it! Go back to your favourite stock photo site and find a fish. Zoom in to 300% and use the pen tool again to cut it out of the background. You don’t have to be too accurate with this, as you will see soon.

Step 10
CRTL+click the paths thumbnail to make a selection and then CRTL+C to copy. Go back to the underwater doc, and CRTL+V to paste. Make sure you drag the fish layer under the top layer. Of course, the fish is way too big, so CRTL+T to enter transform mode. Hold the SHIFT key and drag one of the corners inwards to scale it down. Rotate a little and position it correctly.

Step 11
Now, here’s why we didn’t have to cut out the fish too well. Because we want to make the fish appear to be in the foreground, we’re going to blur it. Go Filter>Blur>Gaussian Blur. I decided to move the big fish. It just didn’t seem right over the sub. Anyway, press ‘V’ for the move tool while holding down the ALT key. This copies it. Then it is just a case of entering transform mode (CRTL+T) and making them bigger or smaller, rotating them a little, flipping them horizontally, etc.

Step 12
Hit SHIFT+CRTL+E to merge all the visible layers without interfering with the blend modes. Drag the layer that is left over to the ‘Create new layer’ icon and change the blend mode to screen. Add a Gaussian blur filter to it and the image brightens and gives a kind of fantasy feel to it.

Step 13
Go View>New guide and type 33,3%. Do it again and type 66,6%. Then repeat, just changing the vertical and horizontal check boxes. You should now have a ‘rule of thirds’ grid, which is great to see if the composition is good. You should really do this before you merge the layers, but I like to use my eye and see how close I was later. Basically, the fours points where the guide lines meet are the points of interest. Here, we have the captain of the sub and the big fish. And that’s it, a very simple way of creating your own photos of scenes that don’t exist.
