Gears of War Website Header
Learn how to make a complete Gears of War website header (Banner + Navigation) with this tutorial, as shown below:
Step 1:
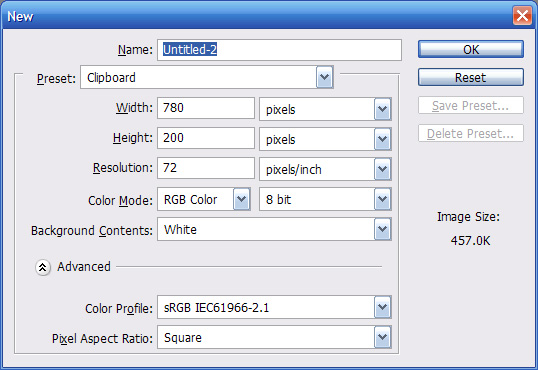
Create a new document. The dimensions should be however wide your banner will need to be and how tall it should be; add 50 pixels to the height for the navbar portion.
Step 2:
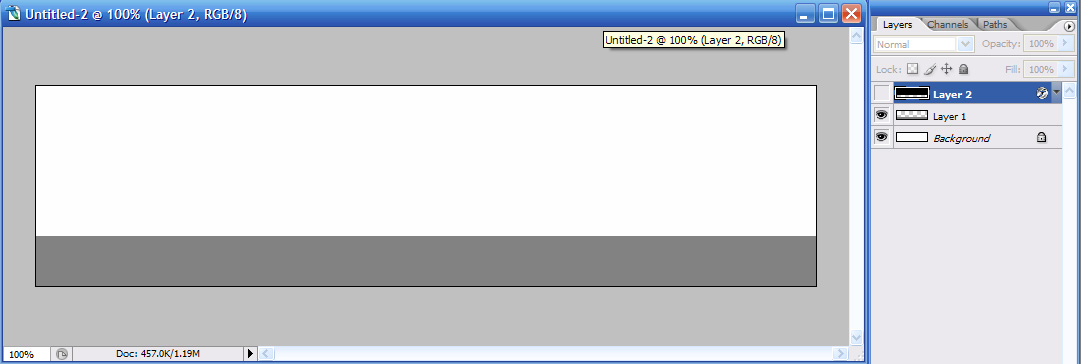
Now we will start to make the borders. Select your Rectangular Marquee tool. At the top, there will be options to change how your tool works. Change the Style to Fixed Size, the width to your banner’s width in pixels, and the height to 50 pixels.

Select the bottom portion of the canvas.

Create a new layer, and then fill with Grey (or anything else except black or white).
Step 3:
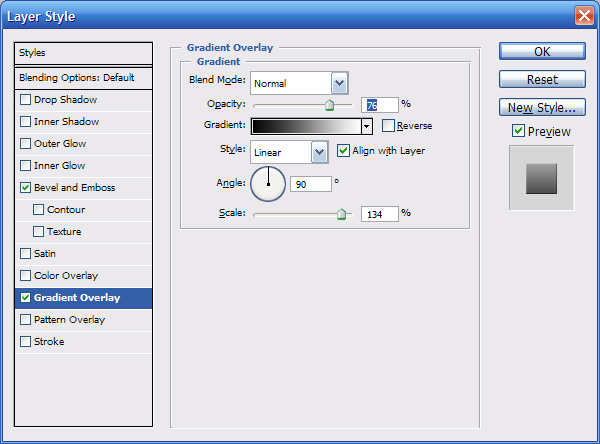
Create a new layer, press CTRL+SHIFT+I to invert your selection, and then fill it with black. Press CTRL+D to deselect.
Then go to Layer Styles, and apply a gradient with these settings.

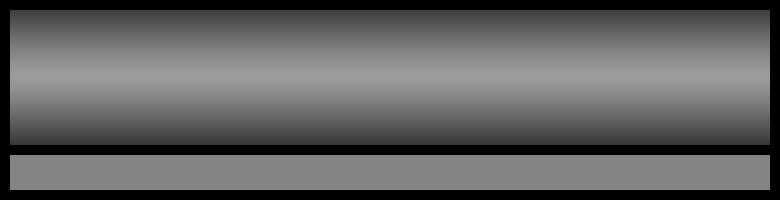
This is what your document should look like right now.
Step 4:
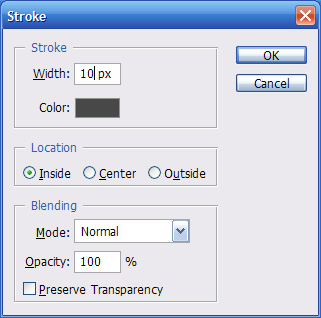
Create a new layer; this will be your border layer. With your new border layer selected, go to EDIT>SROKE with these settings(the grey used is “474747“:
Now CTRL+Left click on your gradient layer. Make sure you have your border layer selected. Do EDIT>STROKE with same settings but change the Width to 5px. Do the same thing as above, but CTRL+Left click on your navbar layer. Again, making sure your border layer is selected, EDIT>STROKE 5px. Now we should have a 10px border around the entire document, and a 10px line in between the gradient layer (banner) and the navbar portions.
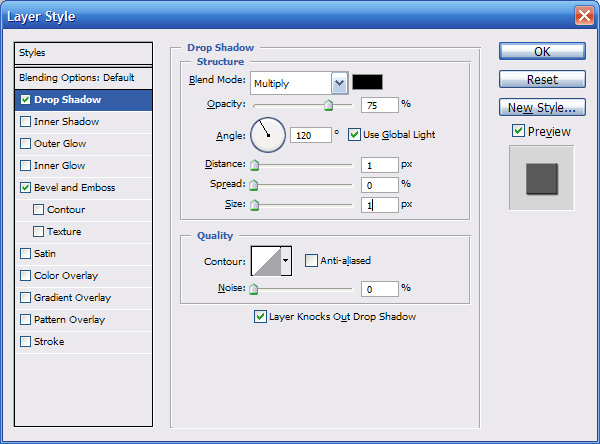
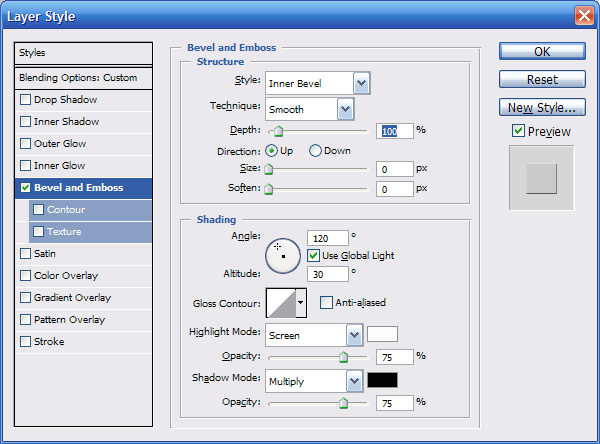
Step 5:
Now we will be adding some layer styles to the border. Go to Layer Styles, and apply a Bevel and Emboss with these settings:
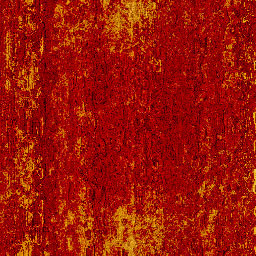
Using this rust pattern, we will be applying a rust effect to the border.
Paste the rust layer a few times and position them so that the entire document is covered. Then merge your rust layers into one layer (CTRL+E).
CTRL+Left click on your border layer to select your border. next CTRL+SHIFT+I to invert your selection. Click on your rust layer, and press DELETE.
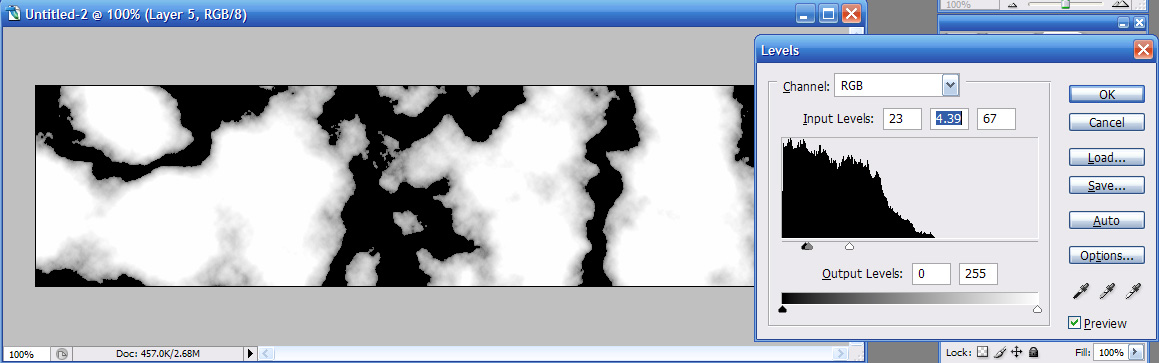
Create a new layer, and go to Filter>Renders>clouds. Next do Filter>render>difference Clouds. Then do CTRL+L to get into the levels adjustment. Try to get the same effect as I have
Now depending on how your clouds came out, select the color that is less of. In my case, I would use the Magic Wand Tool, click on a black part, then right click and choose similar. Keep the selection, and click on the rust layer, and press delete. You can now dispose of the clouds layer as we won’t be using it for anything else. If your rust looks fake, cheesy, whatever, redo the clouds part to get a new result.
Change the blending mode of the rust layer to ‘Overlay’. Apply layer styles, bevel and emboss, change the size to 0.
Step 6:
Its time to put our renders in. Paste your render of choice, and resize it so it will fit appropriately (make sure you place your render UNDER your border and rust layers). Select your border layer. With your magic wand tool, click on the empty space of the Banner portion.
Invert your selection (CRTL+SHIFT+I). click on your render layers, and press delete.
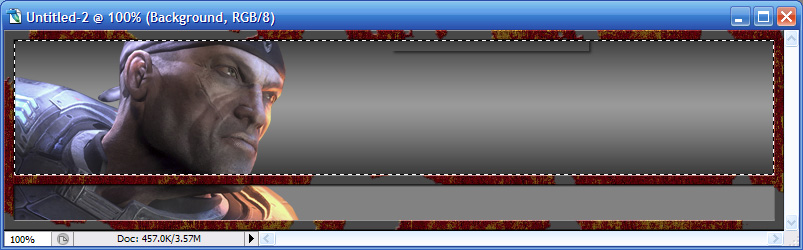
This is what I have up to now
Step 7:
We will start to put our navbar in now.
Create a new layer under your border and rust layers. First add the buttons. For this tutorial, I will be adding 4 buttons. You may add as many buttons as you need though. Get a calculator; we will be doing a little math so we can get our buttons equal. Take the length of your banner, and subtract the width of the borderx2(in this tutorial, the width was 10, so we would subtract 20px). Take this width, and divide it by how many buttons you will be making. Now create a new document, with the width of one button, and a height of 50(or however tall you reserved for your navbar).
Fill with Grey “848484“, CTRL+A (select all), CTRL+C (copy), and CTRL+V (paste) into your main document. Paste however many buttons your adding, and align them so they do not overlay each other.
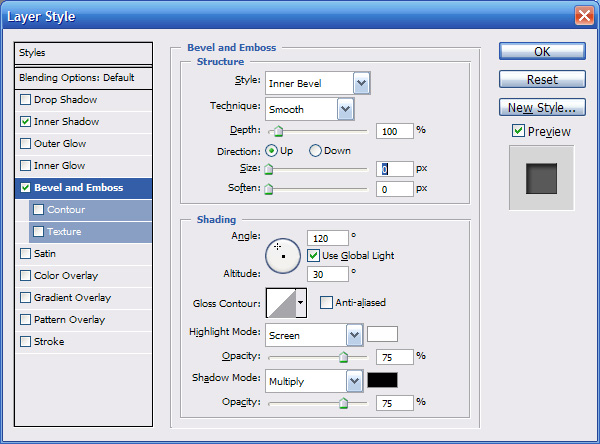
Select a button, and go to your layer styles. Apply bevel and emboss and gradient with these settings:
Right click on the button that you applied the layer styles to, and copy layer styles. Paste the layer style onto each button. Optionally, you can reduce the opacity of your button layers to around 65% like I have in my example. I put text for each button in the gears of war font, with a drop shadow (distance 1, size 0) to make it look a little bit more like the real gears of war font.
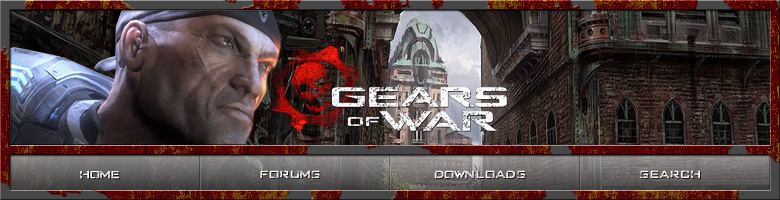
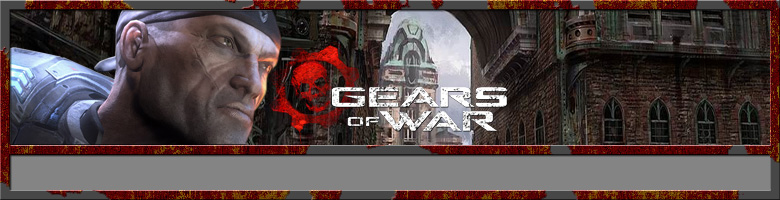
My final result: