Pixel Maps
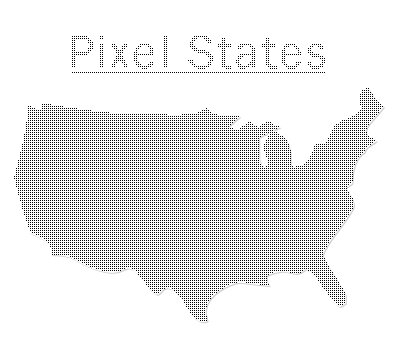
First off, let me explain how this is going to work. I am downloading a font called Dingmaps. Click the link to download the font. Then after that I will place the font at a large size and fill it with a pattern. Above is a sample of a finished product.
Start off by selecting the text tool and typing 1 on your keyboard using the font “Dingmaps” which you downloaded in step one hopefully. Make sure it is set to a large size like 300+ so it will have a better result.

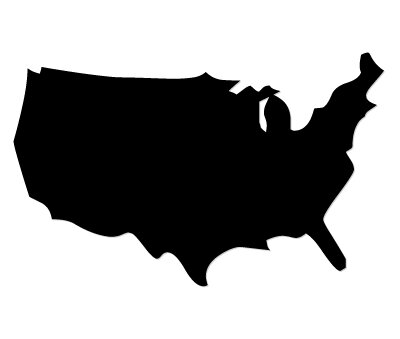
Next, find your Magic Wand Tool and click on the big black state. Now create a new layer. To create a new layer look on the bottom of your layers window and hit the icon that looks like a paper (6th icon from left to right).
Now it’s time to make a pattern. To do this simply create a new document (File>New). Make the document size set to 2×2 pixels. Select your pencil tool with a #000000 (black) color and fill in the top left corner with a 1 pixel block.Then after you created the pattern, go to Edit>Define as Pattern. Now go back to the original document with the map on it. Click in the selction (with the magic wand tool) and use the pant bucket to put the pattern in there.
Go back to the original text (the map actually) and change the color of it to WHITE or whatever the background color is on your document (mines white). Now add a drop shadow, use the following settings below. Everything else as default.Opacity: 19
Distance: 1
Spread: 0
Size: 0
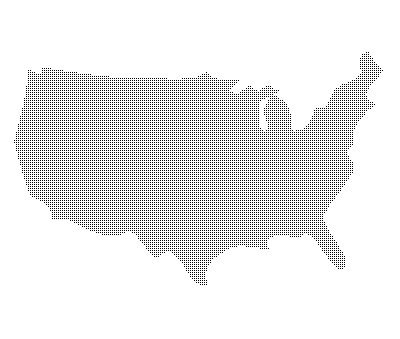
Now you should be completely finish and have something like you see above Step 4. If you don’t, you might have messed up when creating the pattern. Look back at the step and read it more carefully. If you have anymore problems, please contact me at admin@www.avivadirectory.com/photoshop.