Professional Dark Web Button
This tutorial will show you how to make a Professional web button and also to use it like a Navigation Bar.
1. Make a rectangle with the Rectangle Tool (any color) and Rasterize it.

2. Then ad a Gradient Overlay: #252525, #595959 and #9a9a9a

3. And a Stroke: #424242

4. Make a gradient just over the middle of the button and go to Select/Modify/Contract and put 1px, then create a New Layer and fill it with any color, press Ctrl + D and change the fill to 0%

5. Add a Stroke: Transparent to White

6. Your button should look like this:

7. Create a New Layer and make a selection 1px height and fill it with a Radial Gradient, White to Transparent, starting out from the middle and deselect.

8. Now you’re going to do the same you did in the Step 7 but using #4a4a4a for the gradient.

9. And you should have something like this:

10. Create a New Layer and make a selection as shown below and fill it with a Linear Gradient #dadada to Transparent

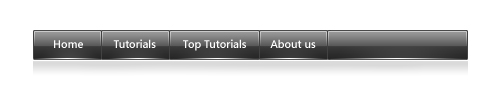
11. Finally add some text, using Segoe 13 pt.

Also you can make a Navigation Bar like this, using the same steps.