Space Nebula
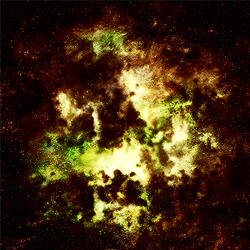
This tutorial will teach you how to do a space nebula in Adobe Photoshop like the one below:

before we start, things you will need:
1.) Photoshop open (Duh!)
2.) (download and load in photoshop)
brush set was made by http://ryan2006.deviantart.com
that’s about it, ready to start!
Step 1:
Make a new document (500×500 is what im using)
hit ‘D’ to reset the back and foreground color
now hit “X” to have Black as the background color
and press Ctrl+Backspace to fill the background black
Step 2:
Now make sure for this step that you have the brushset mentioned in the beginning of the tut installed
now make a new layer
press “B” to go to the brush tool, and select any of the brushes downloaded
now make a few brush strokes around the middle of the image (you could use more than one brush)
Step 3:
Now that you have some brushing in the middle of the image select the Eraser tool ( ‘E’ )
make the size around 100-120px
and go to the brushes tab, select texture, and select the “Cloud” texture (comes with photoshop)
cloud texture shown below:

Now that you have your texture selected, erase a few spots around the picture, so it starts to look more like a nebula
should look something like this now:

Â
Â
Step 4:
go to Filter > Sharpen > Sharpen
now duplicate your layer

now on the duplicated version go to
Filter > Blur > Gaussian Blur
set the radius to ‘2’
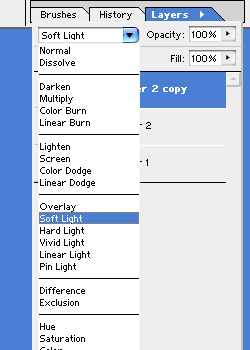
and now after you have blurred the image, set the setting to ‘Soft Light’

now we’re done with the shape and stuff, let’s move on to coloring it
Step 5:
Go to Layer > New Adjusment Layer > Color Balance
set the settings to
Midtones: +31 , 0 , -31
Highlights: +22 , 0 , -28
Shadows: +35 , 0 , -33
or something else that you like
press ok after you are satisfied with the settings
Step 6:
go to Layer > New Adjusment Layer > Curves
set the settings like below (or close enough is fine):

Step 7:
Now for extra coloring you could follow this tutorial.
after you have added a few more layers of coloring, like shown in the tutorial above, you should have somehting like this:
be sure to set the color layers to ‘Overlay’

Step 8:
Now you’re basically Done! it’s time to add some stars, but I’m not gonna go much over that, just a few tips.
for stars, use the brush tool in 1-3 px and go to the brush settings and mess around with the Shape Dynamics and Scattering tabs, these will make your stars be spaced out.
and everytime you add stars use the eraser tool to erase some too.
here’s what I came up with after messing around with stars and stuff:
