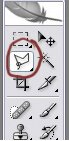
Step 1:
Click on the ‘Polygonal Lasso Tool’
 Step 2:
Cut the tooth out as shown below using the Polygonal Lasso Tool and paste it onto a new layer (ctrl+c, ctrl+v).
 Step 3:
Next click on ‘Free Transform’ and drag the tooth down as shown in the picture below to lengthen the tooth.
 Step 4:
After you have made the tooth longer, click onto Edit then Transform then Perspective and shape the cut out tooth piece to make it look more like a fang. (Sometimes you may want to use the Distort instead of Perspective. Just experiment and chose, which looks more realistic.
 Step 5:
In most cases you will need to duplicate the transformed layer. Next use ‘Transform’ again on the new layer to give the fang a pointed tip. You can also use ‘Rotate’ to change the position of the tooth’s tip. Merge all layers.
 Step 6:
Now its time to use the ‘Clone Stamp Tool.’ Clone different parts from around the tooth’s area and cover the joints and uneven areas to give the tooth a more realistic look.

 Step 7:
Now all that is left is to clean up the tooth and make sure it blends thoroughly in with the other teeth in the mouth. This prevents the fang from looking fake. Go over the tooth again with the cloning tool before finishing off with the ‘Soft Paintbrush’ (Opacity 30). To make the tooth as realistic as possible choose different tones with the ‘Eyedropper Tool’ and remember to look at the original tooth aswell as the tooth next to it for reference.

That’s all folks! I hope you made a really realistic fang for your photographs. Tutorial originally written by
wycked. Permission given to display the tutorial.