Creating Actions for Batch Processing
In this tutorial you will learn on how to make your own actions to automate your work flow. The process here can be used to almost anything you would like to be automated.
Ever happened that you snapped 100 pictures only turning out to be highres to be emailed and then you will start one by one to reduce the size, after this tutorial you will be able to do this very quickly.
It happens to be that i have a few pictures of flowers i took, i want them, to be sent to a friend, I will reduce the size of the picture, desaturate it, reduce its quality just a tad, so the size is reduced. Lets ROLL!!
I usually open a copy of one image to record an action, then later get rid of it, once the action is recorded. I have a few images of flowers that i photographed, and would like to reduce them to half the size of what the images are at present.
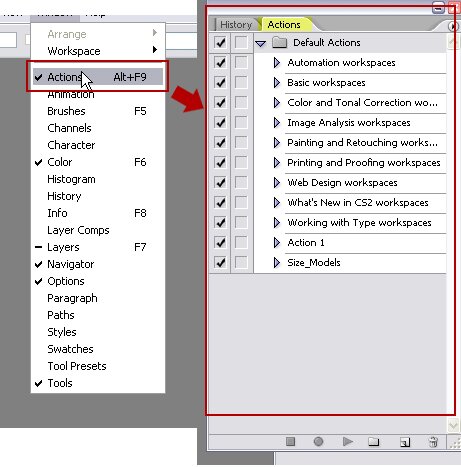
Open the Actions panel by going in the Window > Actions or press ALT+F9
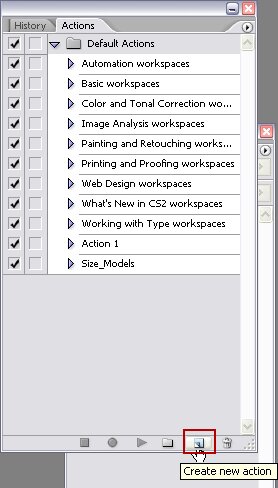
On the Actions panel create a new action, press the little note icon, to insert a new action.
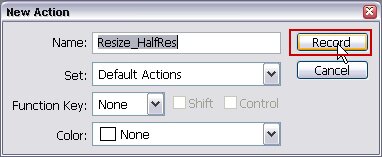
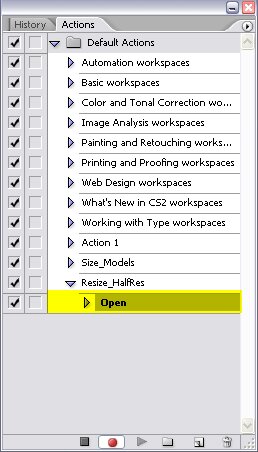
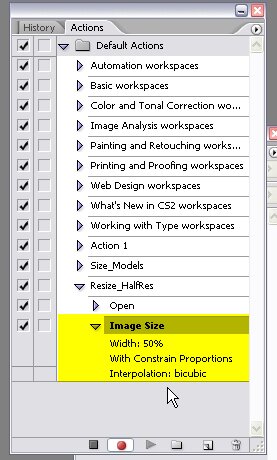
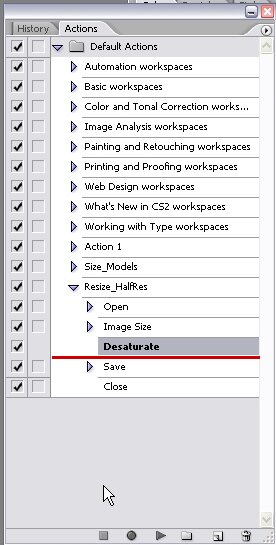
Rename the action to Resize_HalfRes, a good naming convention can make life easier.

Once the name is changed press the Record button.
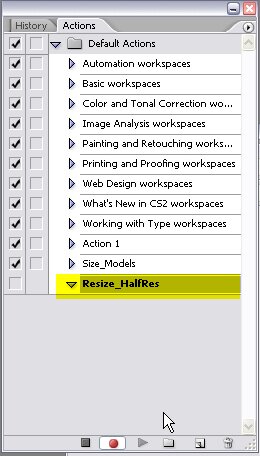
Notice in the screen shot (highlighted yellow), that the record button on the action panel is ON, and you have a new action in the panel.
Any command or action you perform in photoshop will now be recorded.
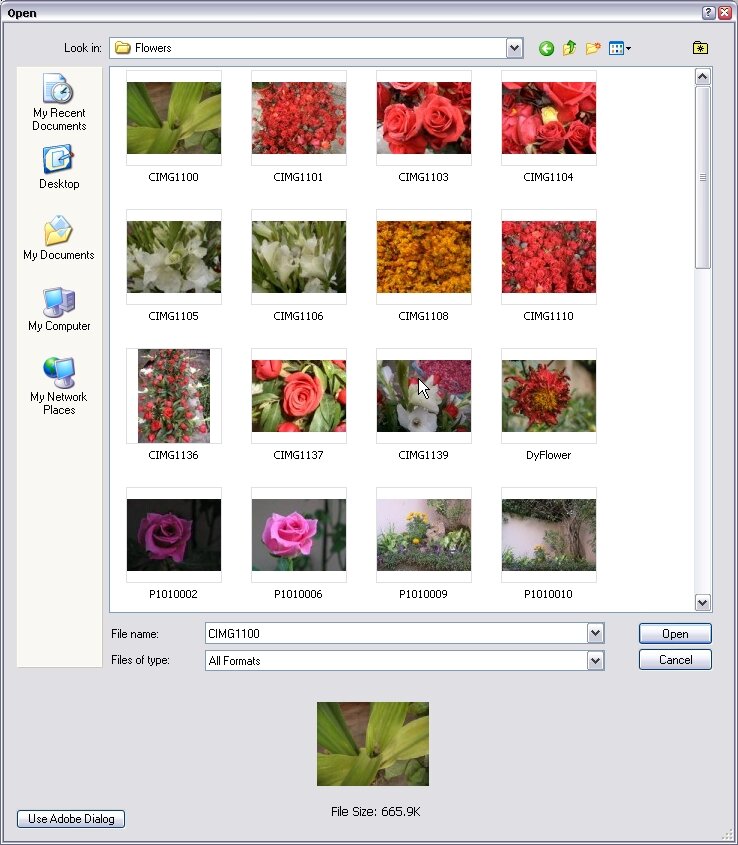
The first action is to open the image, go to the menu File > Open, then browse to the image you want to open, and open it.
Once you open it you will see an open action in the actions panel.
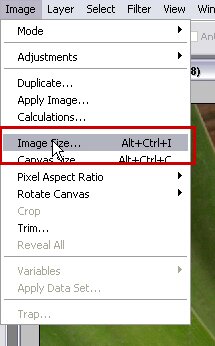
Next resize the image. Image > Image Size.
Here the image is reduced to 50%, type in 50% and press the OK button.
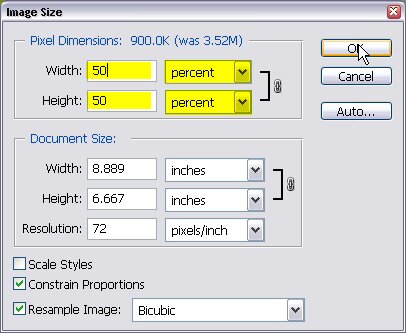
Note here in the screen shot, highlighted yellow area, the Image size action we performed has been recorded by Photoshop.
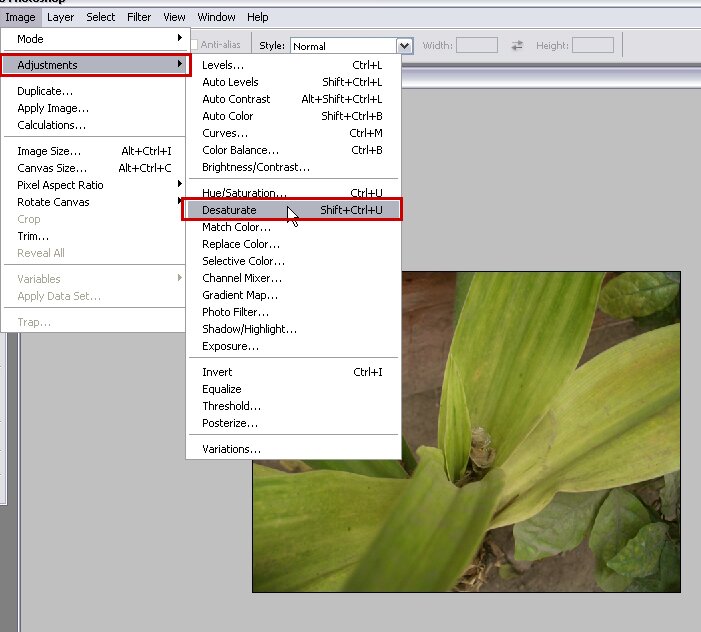
Next desaturate the image.
Go to Image > Adjustments > Desaturate.
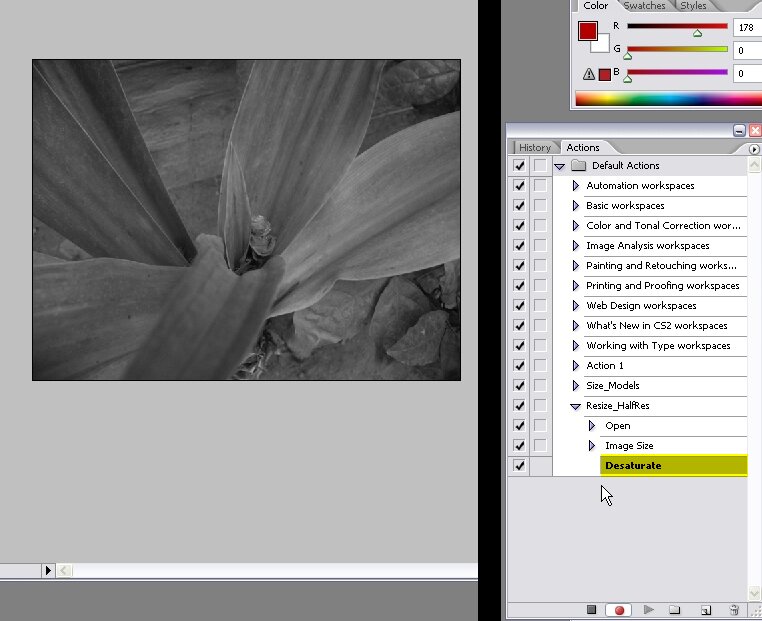
See screen shot, the results after the desaturate adjustment has been applied.
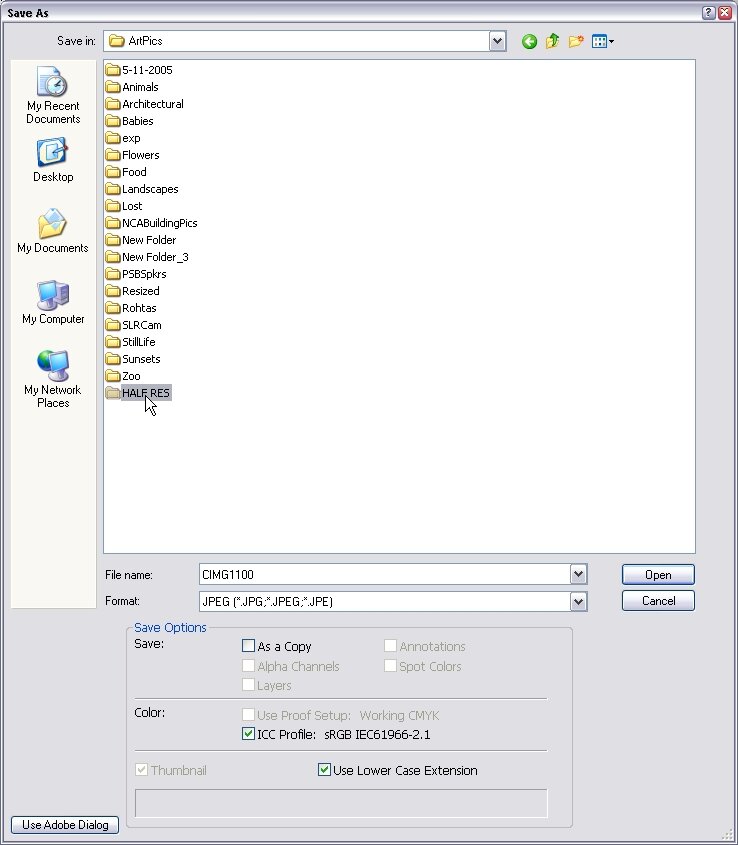
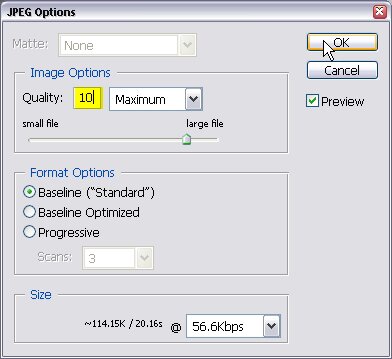
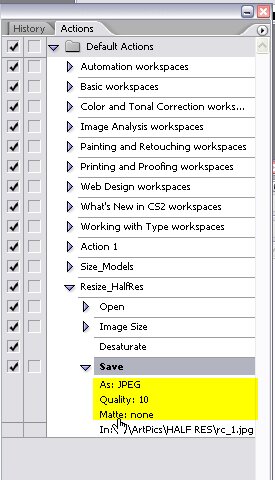
Go to File > Save As… , and then browse the folder where you want the image to be saved. Save as a jpg.
Next a JPEG Options dialog will appear. Reduce the image’s quality to 10
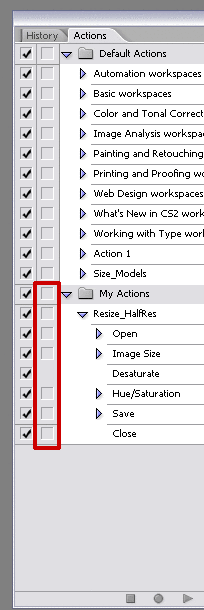
Notice how all your actions have been recorded, along with the attributes that we applied.
Once you save the image, close it. So that the close action can be recorded too.
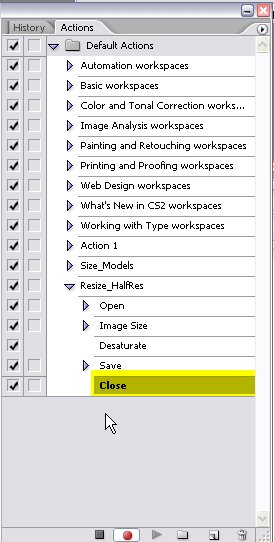
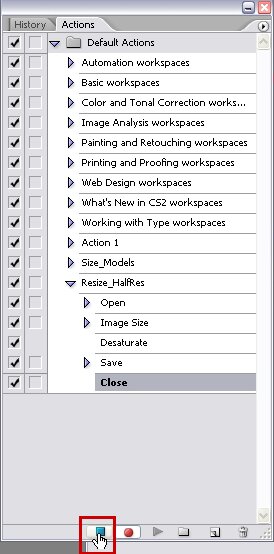
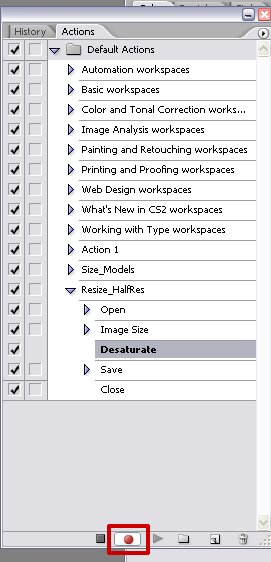
Press the Stop button to stop all recording
It is possible that you might forget something after the recording has been stopped, In this case the Hue/Saturation got missed, and that needs to be applied as well, which had to follow after the desaturation. To insert the Hue/Saturation action after the Desaturate click the Desaturate action so it is selected, now the action will be recorded below this.
NOTE: Before you hit the record button, do open up the image once again.
Hit the Record button again.
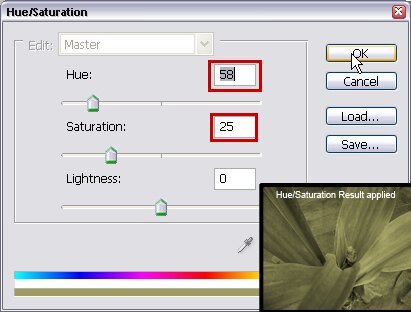
Go to Image > Adjustments > Hue/Saturation

I just made some changes here Hue set to 58 and Saturation to 25. You can see the result in the small thumbnail.
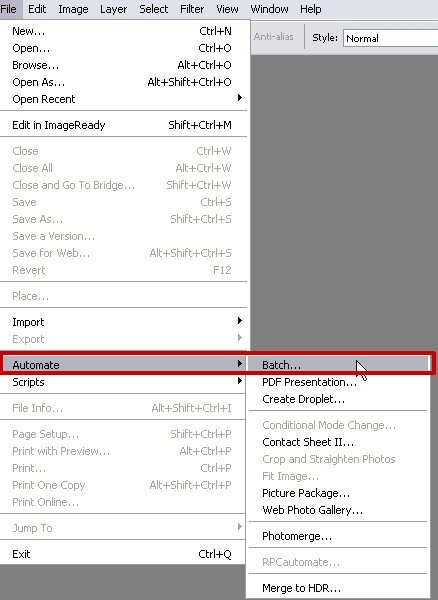
Now comes the fun part. We want to apply this to 10 or 20 or 200 images, whatever the amount is. For this purpose we need to do a batch process, so that photoshop can automate the process and play the action we just recorded on each of the image.
Goto File > Automate > Batch…
Once you click the batch, The Batch window opens up. Its fairly easy to understand.
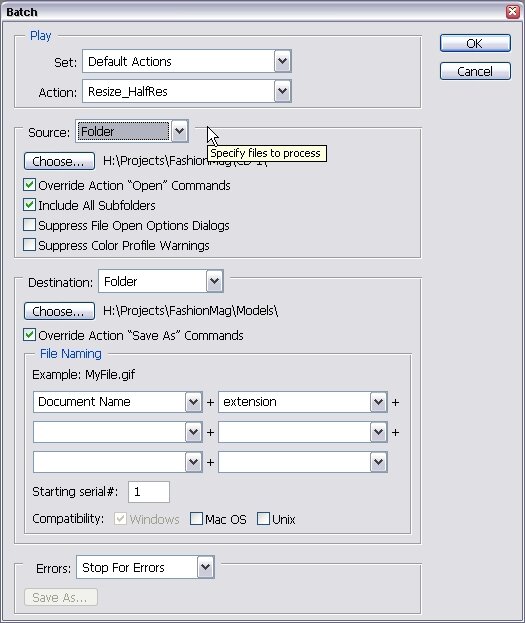
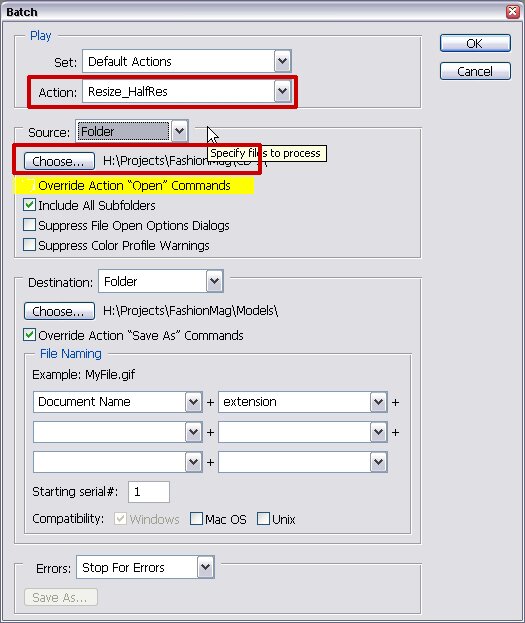
In the action drop down, select the name of the action we just. created. Select FOLDER from the source dropdown, next choose a folder from where all your original images to be resized are kept.
Keep the override action open commands, checked.When it is checked it will read the open command from the action we created.
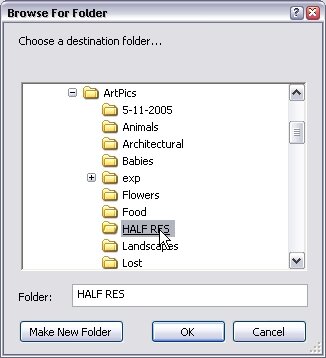
Choose a destination folder. where you want all the resized images to be saved.
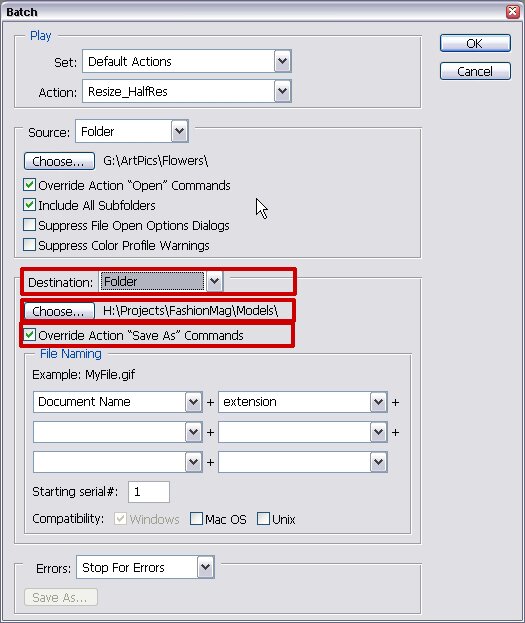
I selected a folder I made for this purpose. Hit the OK button.
Next press the OK button on the Batch window, and you will see windows opening and closing, see the actions panel, all the actions we create will be played each time an image is opened.
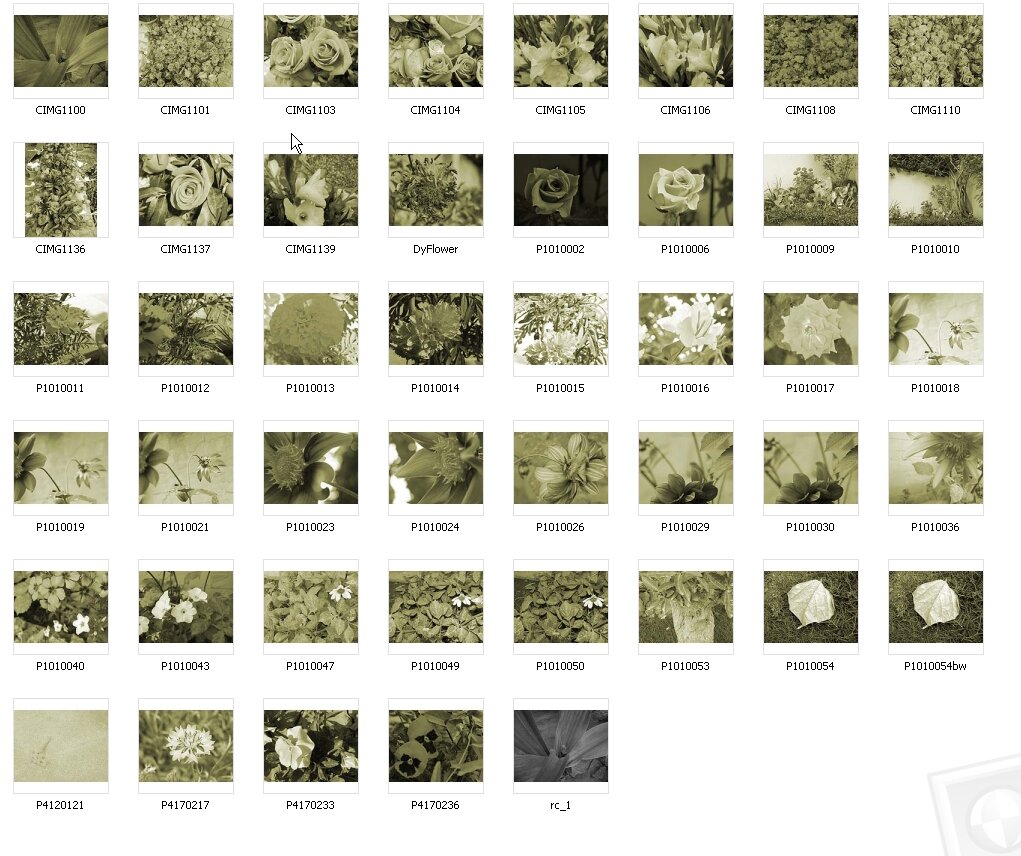
Heres the result of my images, resized with few seconds.
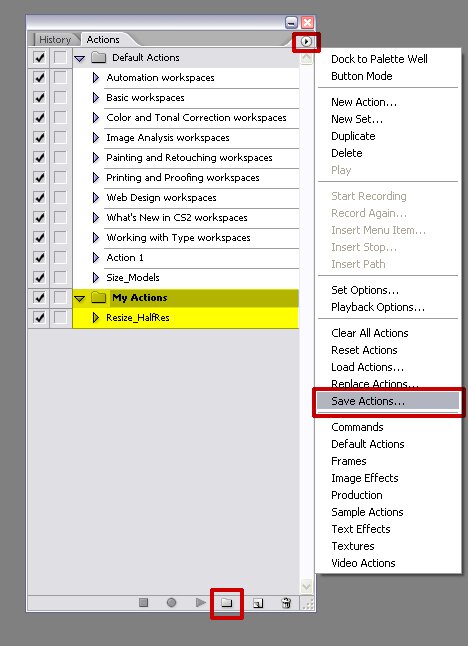
You can Create your own Action groups/folders, by pressing the Folder icon(bottom of the actions panel). Here simply I created the folder/new set (create new set) and dragged down the Resize_HalfRes action to the new set My Actions. You can also save these actions as, by going in the Panels menu and choosing the Save Actions option.
An important thing to note are the small icons (highlighted in the screen shot, Dialogue Toggle On/Off), by default they are blank, if you click one of them you will see a grey icon, this means that on each step when it is played back, PS will ask you for the options to be set, and will give you the dialogue box for the respective step if it has any options/attributes etc.
You can also have only some actions to prompt you for the dialogue box, simple click on the grey icon next to the action to turn OFF the dialogue box that you dont want to set the options for, during play back. When you do this, the icons, two of them at the top of the set will change to some redish color, this indicated that not all actions in the group have the Dialogue toggle on, some have it off too.
The small check marks you see, if you click on any one of them that item will be turned OFF and not play when the actions are played.
That’s all for this! Good Luck!