Creating Paint / Blood Dripping Text
In this tutorial you will learn how to give your text some dripping blood, as shown below:

Start a “400×200” pixels, 16 million colors, white background image. Add a new Raster Layer (Layers>New Raster Layer). Enter any text as shown below using the Type Tool on the new layer.
My Text Settings:
Font = 08 Underground Color = Black) Size = 72 Antialias = Checked Floating = Selected
Stroke = 0

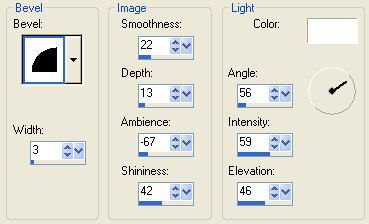
Apply Inner Bevel filter (Effects>3D Effects>Inner Bevel) on the current text selection.


Add a new layer (Layers>New Raster Layer). Then, Floodfill text selection with “#ff0000” (red) color. Apply Inner Bevel Filter (Effects>3D Effects>Inner Bevel) using the previous settings.

Deselect the selection by pressing “CTRL+D“. Make sure your active layer is ‘Raster 2‘ (red font layer). Pick the “Eraser Tool” and randomly erase the lower portion of the red text revealing the black text as shown below.


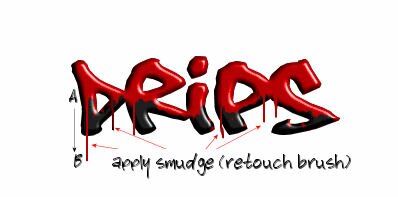
Pick the “Smudge Tool” and apply the smudge brush on the selected areas as shown. Simply click your mouse on the starting point (Point A) and drag your mouse towards Point B.

Repeat same procedure in Step 5 using different brush sizes. Now you are DONE! You should have gotten something like this: