Glassy Style Forum Signature
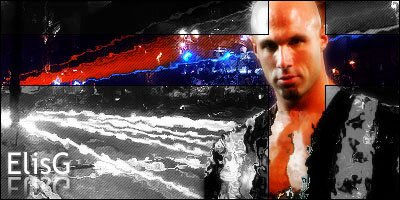
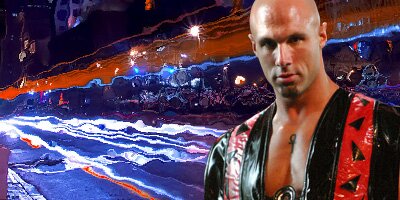
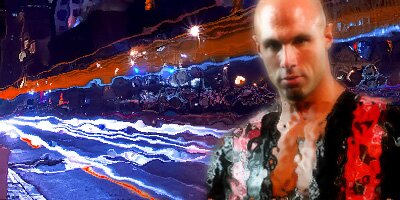
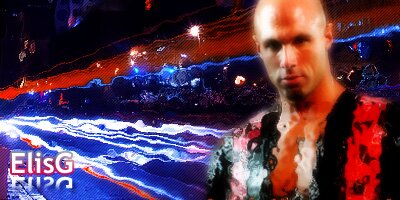
In this tutorial I am going to teach you how to make a signature that looks something like this with ease:
If you think it looks hard, think again, I’m going to tell you every step. So lets get started.
Step 1: Creating the Background
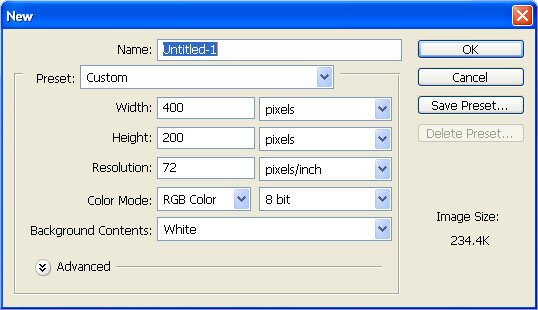
Open up Adobe Photoshop (I use CS2 but I’m sure it can be done on other versions) and create a New Document (File > New) and apply these settings:
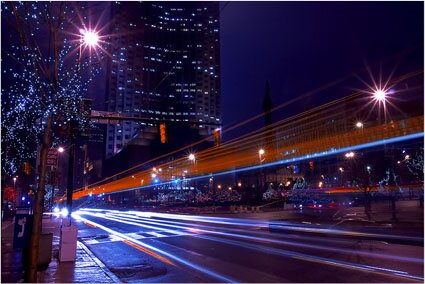
Now we are going to use a stock image and filter it, if you want you can use brushing but in this case I’m using a stock. If you can’t find a stock try deviantart.com or even do a google image search. Here is a scaled down version of the stock I will be using:
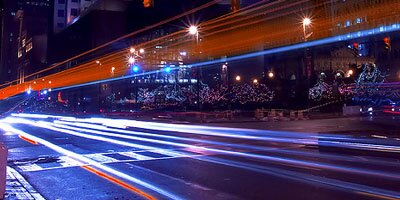
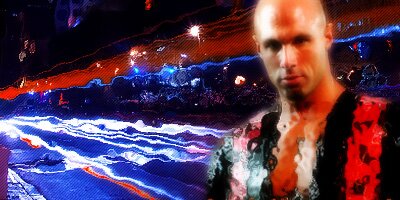
OK so add the image onto your canvas and you should get this:
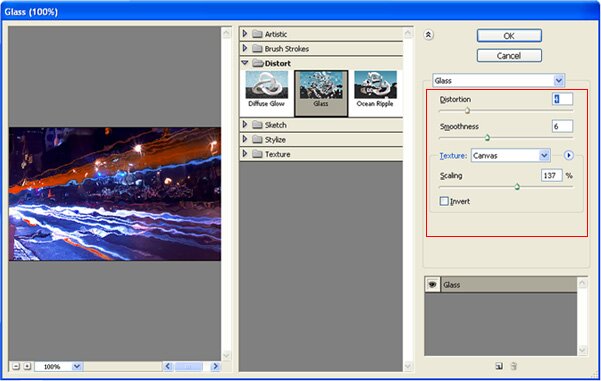
Next we need to apply filters, we’ll be using the glass filter. So open up the glass filter settings menu (Filter > Distort > Glass). Apply these settings:
Step 2: Adding The Render
Next we’re going to add a render. If you want to cut it by yourself then paste the object into a new canvas and zoom in (ctrl+Z), then select the Eraser Tool and erase the background. You can also get renders from sites such as mafiagraphics.com and psdprotocol.com. Heres the render I’m adding:
Now we are going to make the render look nicer. Set the contrast to “25” (Image > Adjustments > Brightness and Contrast). Now duplicate it and set the bottom layer to Gaussian Blur at “4.0” pixels (Filter > Gaussian Blur). Set the top layer’s opacity to “52%” (depending on your render it may need to be higher or lower).
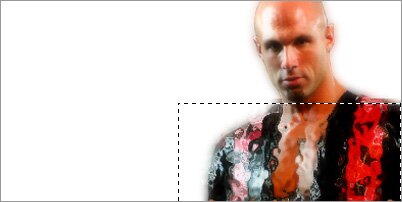
Merge the layers (ctrl+e). We’re going to add the glass effect to his body. Move your render onto a new canvas and make a brief selection of everything except his head using this option in the selection tool:

Hit cut, and then paste it back there. Select your render’s head and press cut, and then paste it back again. Select the body layers and apply the glass filters as before, add the head and the body together and position them. Then merge (ctrl+e) and move back onto your main canvas.
Step 3: Enhancing your Image
Select your whole image and Copy merged (shift+ctrl+C). Then paste (ctrl+V) set this to Gaussian Blur at “4.0” pixels (Filter > Gaussian Blur). Now set this to “Soft Light“.
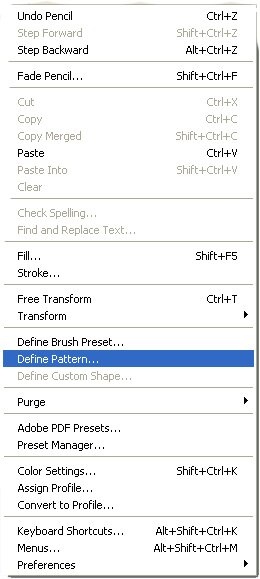
Now open a new document (3×3). Zoom in as far as you can (ctrl+ +) And add a diagonal line going across like this:

Click “Define Pattern“.
Now add a new Fill layer (Layer > New Fill layer > Pattern) and select the pattern you just created. Put this layer behind your render. Set to “Soft Light” at “50%” opacity.
Step 4: Text
We are now going to add some text.
Click the Text Tool “T” and select your font. Type out your text in the bottom left corner. And add a gradient stroke (2 pixels). Then duplicate your text layer and flip it vertically (Edit > Transform > Flip Vertical). Move it so the top of the flipped layer touches the bottom of the original layer. Take the stroke off the flipped layer and add a 50% opacity drop shadow. Erase the a small bit of the bottom of the flipped layer with the soft eraser tool.
Step 5: Optional Effect
If you would like to do this you will need to merge all your layers (Right Click a layer > Merge Visible).
Make a selection like this:

Cut this part, and set the bit that’s left to “desaturate” (ctrl+shift+U). Now paste the cut part and give it a “1 px” black stroke. You should get this:
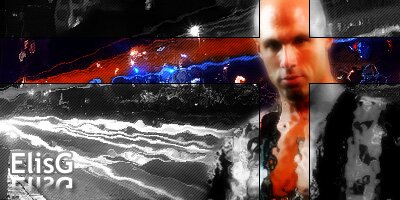
After this merge the layers (ctrl+e)
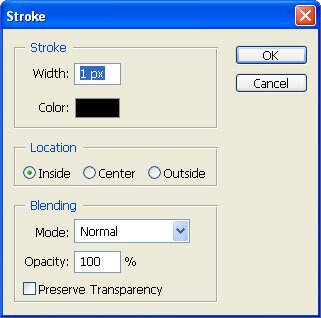
Add a border. To do this create a new layer, click (Select > All) then (Edit > Stroke) and apply these settings:
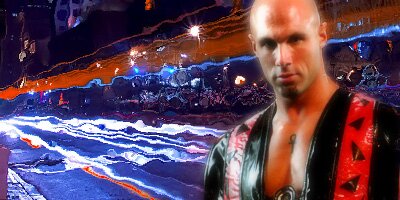
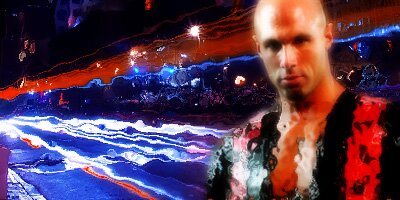
So there we are, you should be left with this:
I hope you have enjoyed this tutorial and have learned something. I also hope your graphic turned out well.