Metalic Navigation Bar
1. Firstly open up Photoshop and create a new canvas. Make sure your canvas is the correct width and height you want your navigation bar to be. I made my canvas 800x200px.
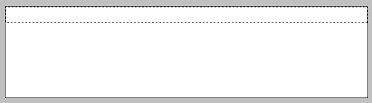
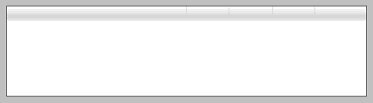
2. Next insert a new layer. Click on the ‘Rectangular Marquee Tool’ and draw a rectangle from one end of the canvas to the other. The height of my navigation bar was 35px. You should have something that looks like this.
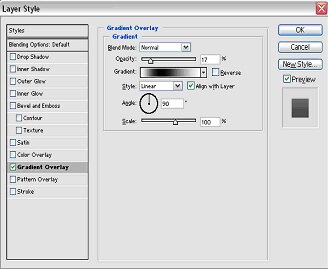
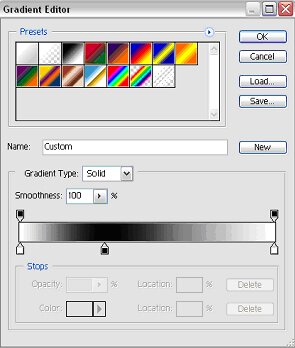
3. Now we have the correct navigation shape press ALT + Backspace on your keyboard and it will fill the selection in with white (#FFFFFF) making sure that your ‘Set foreground colour’ is set to white. Next, click on the ;Add a layer style’ button underneath your layers selection box (F). Apply the following settings under the ‘Gradient Overlay’ tab.
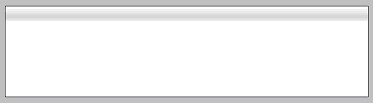
4. After you have applied the gradient overlay settings you should have something that looks like below. At this stage it is just a simple rectangle with a gray gradient.
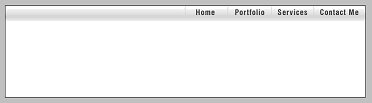
5. Next click on the ‘Line Tool’ which is underneath the ‘Rectangle Tool.’ Change the ‘Set foreground colour’ to a darker gray (#CCCCCC) and from the top of your navigation bar draw a line until it is about half way down. You can see an example below.

6. Now that you have one line drawn you right click on the layer and click on ‘Duplication layer.’ This will create another line layer that you can then move horizontally along the navigation bar. Keep duplicating the lines until you have them evenly space along your navigation bar. You should now have something that looks like this.
7. Next we will add text to the navigation bar. Choose your favourite font and type the text that you want on your navigation bar. I used black font but lowered the opacity in the ‘Blending Options’ to around 70%. This is what mine looked like after adding the text.
8. Now we have a basic navigation bar, we will add the extra pieces of detail over each text section. Insert a new layer and using the ‘Rectangular Marquee Tool’ draw a rectangular shape over the top of one of your text sections like I did below.

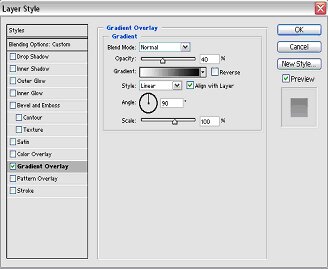
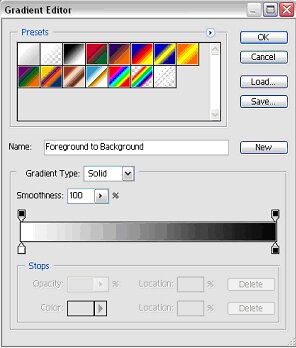
9. Fill this selection in with white by pressing ALT + Backspace. Next apply the following settings.

10. After you have applied the settings, you should have something that looks like this. You will notice that the button looks like it is indented on the navigation bar. You may notice that your text colour has decreased. To prevent this from happening, just drag your text layer above the rectangle layer you just applied.
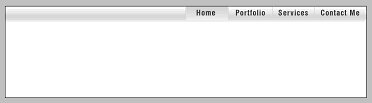
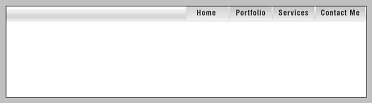
11. Now you have one button complete, apply the same settings to the other buttons you have on your navigation. If you wish to use the same style for each simple right click on the first button layer you made and click on “Copy layer style.” Once you have filled all the other rectangular selections in with white, you can simply right click on all of them and click on ‘Paste layer style.’ After you have applied the same settings to all the buttons you should have something that looks like this. Make sure you insert a new layer for each button.
12. I hope that you have learnt something going through this tutorial and I also hope that you managed to create a professional looking navigation bar for your future websites.
Good Luck!