Movie Clapboard Tutorial
Introduction:
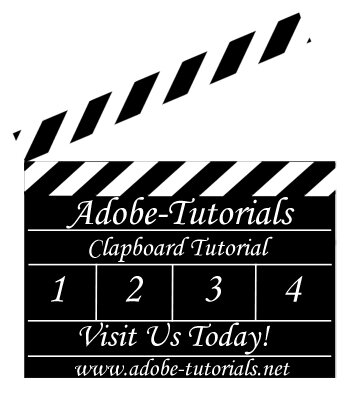
In this tutorial I will be teaching you how to make a simple Clapboard, like the ones used in movies (See Figure Below). This is going to be quick and simple, so let’s get started…
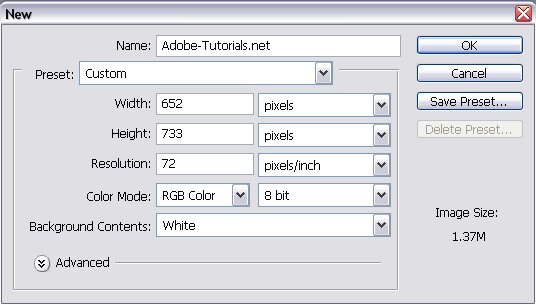
Step 1: New Document
Open up Photoshop and make a new document using the settings below:
Step 2: Clapboard Base
Once you’ve opened up your new document, make a black square at the bottom of the document, using the ‘Rectangle Tool‘ (See Figure Below).

Step 3: Clapper
Now we’re going to make the little clapper at the top. Copy a small section off the top of that black square and then drag it up and rotate it to how you want. Now make thick,white lines going diagonal across the Black Bar. Also apply these thick,white lines to a portion of the black box. Here’s how your should be done:

Step 4: Adding The Section Lines
Now we’re going to add the lines that section off the clapboard. Get out your trusty ‘Rectangle Tool‘ and use the color white to make small sections on the clapboard. Here’s what my result came out to:

Step 5: Adding The Text
Now go crazy and add some text! Once you’ve added the text you’re done! Here’s my final result of my clapboard: