Sleek Portfolio Tutorial
Introduction:
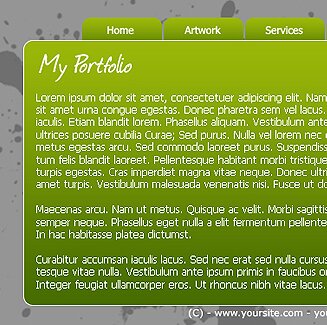
In this tutorial I will be teaching you how to make a sleek portfolio template. You will need basic knowledge of Photoshop. A preview of the final outcome of this tutorial can be seen below:
Things You’ll Need:– Adobe Photoshop
– Journal Font (click here to download)
– Splatter Brush Pack (click here to download)
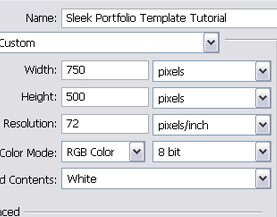
Step 1: New Document
Let’s open up Photoshop and make a new document. Use the settings below for best results:
Step 2: Template Background
Get your ‘Paint Bucket Tool’ and color the background using the color #959595.
Step 3: Content Box
Now get your ‘Rounded Rectangle Tool‘ and make a good-sized square like below. Now add a gradient to your content box going from #476C00 at the bottom to #9AB709 at the top. Now add a simple 1px white stroke. You should now have something like this:

Step 4: Adding Tabs
Get your ‘Rounded Rectangle Tool’ and make around 5-7 tab-looking squares at the top of your content box. Make sure to center them. Add that same gradient from the content box to the tabs. Make sure to place the tabs under the context box in the Layers Palette. You should now have something like this:

Step 5: Adding Text
Use Tahoma, size 12 to add white text to label your tabs. Make sure to center the text in the tabs. I added an anti-aliasing effect of “Strong“. Now with that same font, but size 10, go down to the bottom of your content box and add your copyright statement. Make sure to also center that. Then get the font you downloaded, Journal, and write the title of your portfolio on the top-left side of the content box. You should now have something like this:

Step 6: Splatter Background
Now get the Brush Pack you downloaded and select the brush you like most. In a new layer, make a few grey splats and place it under everything except the background. You should now have something like this:

And now you’re done! You can play with the colors and fonts to make it even more personal.